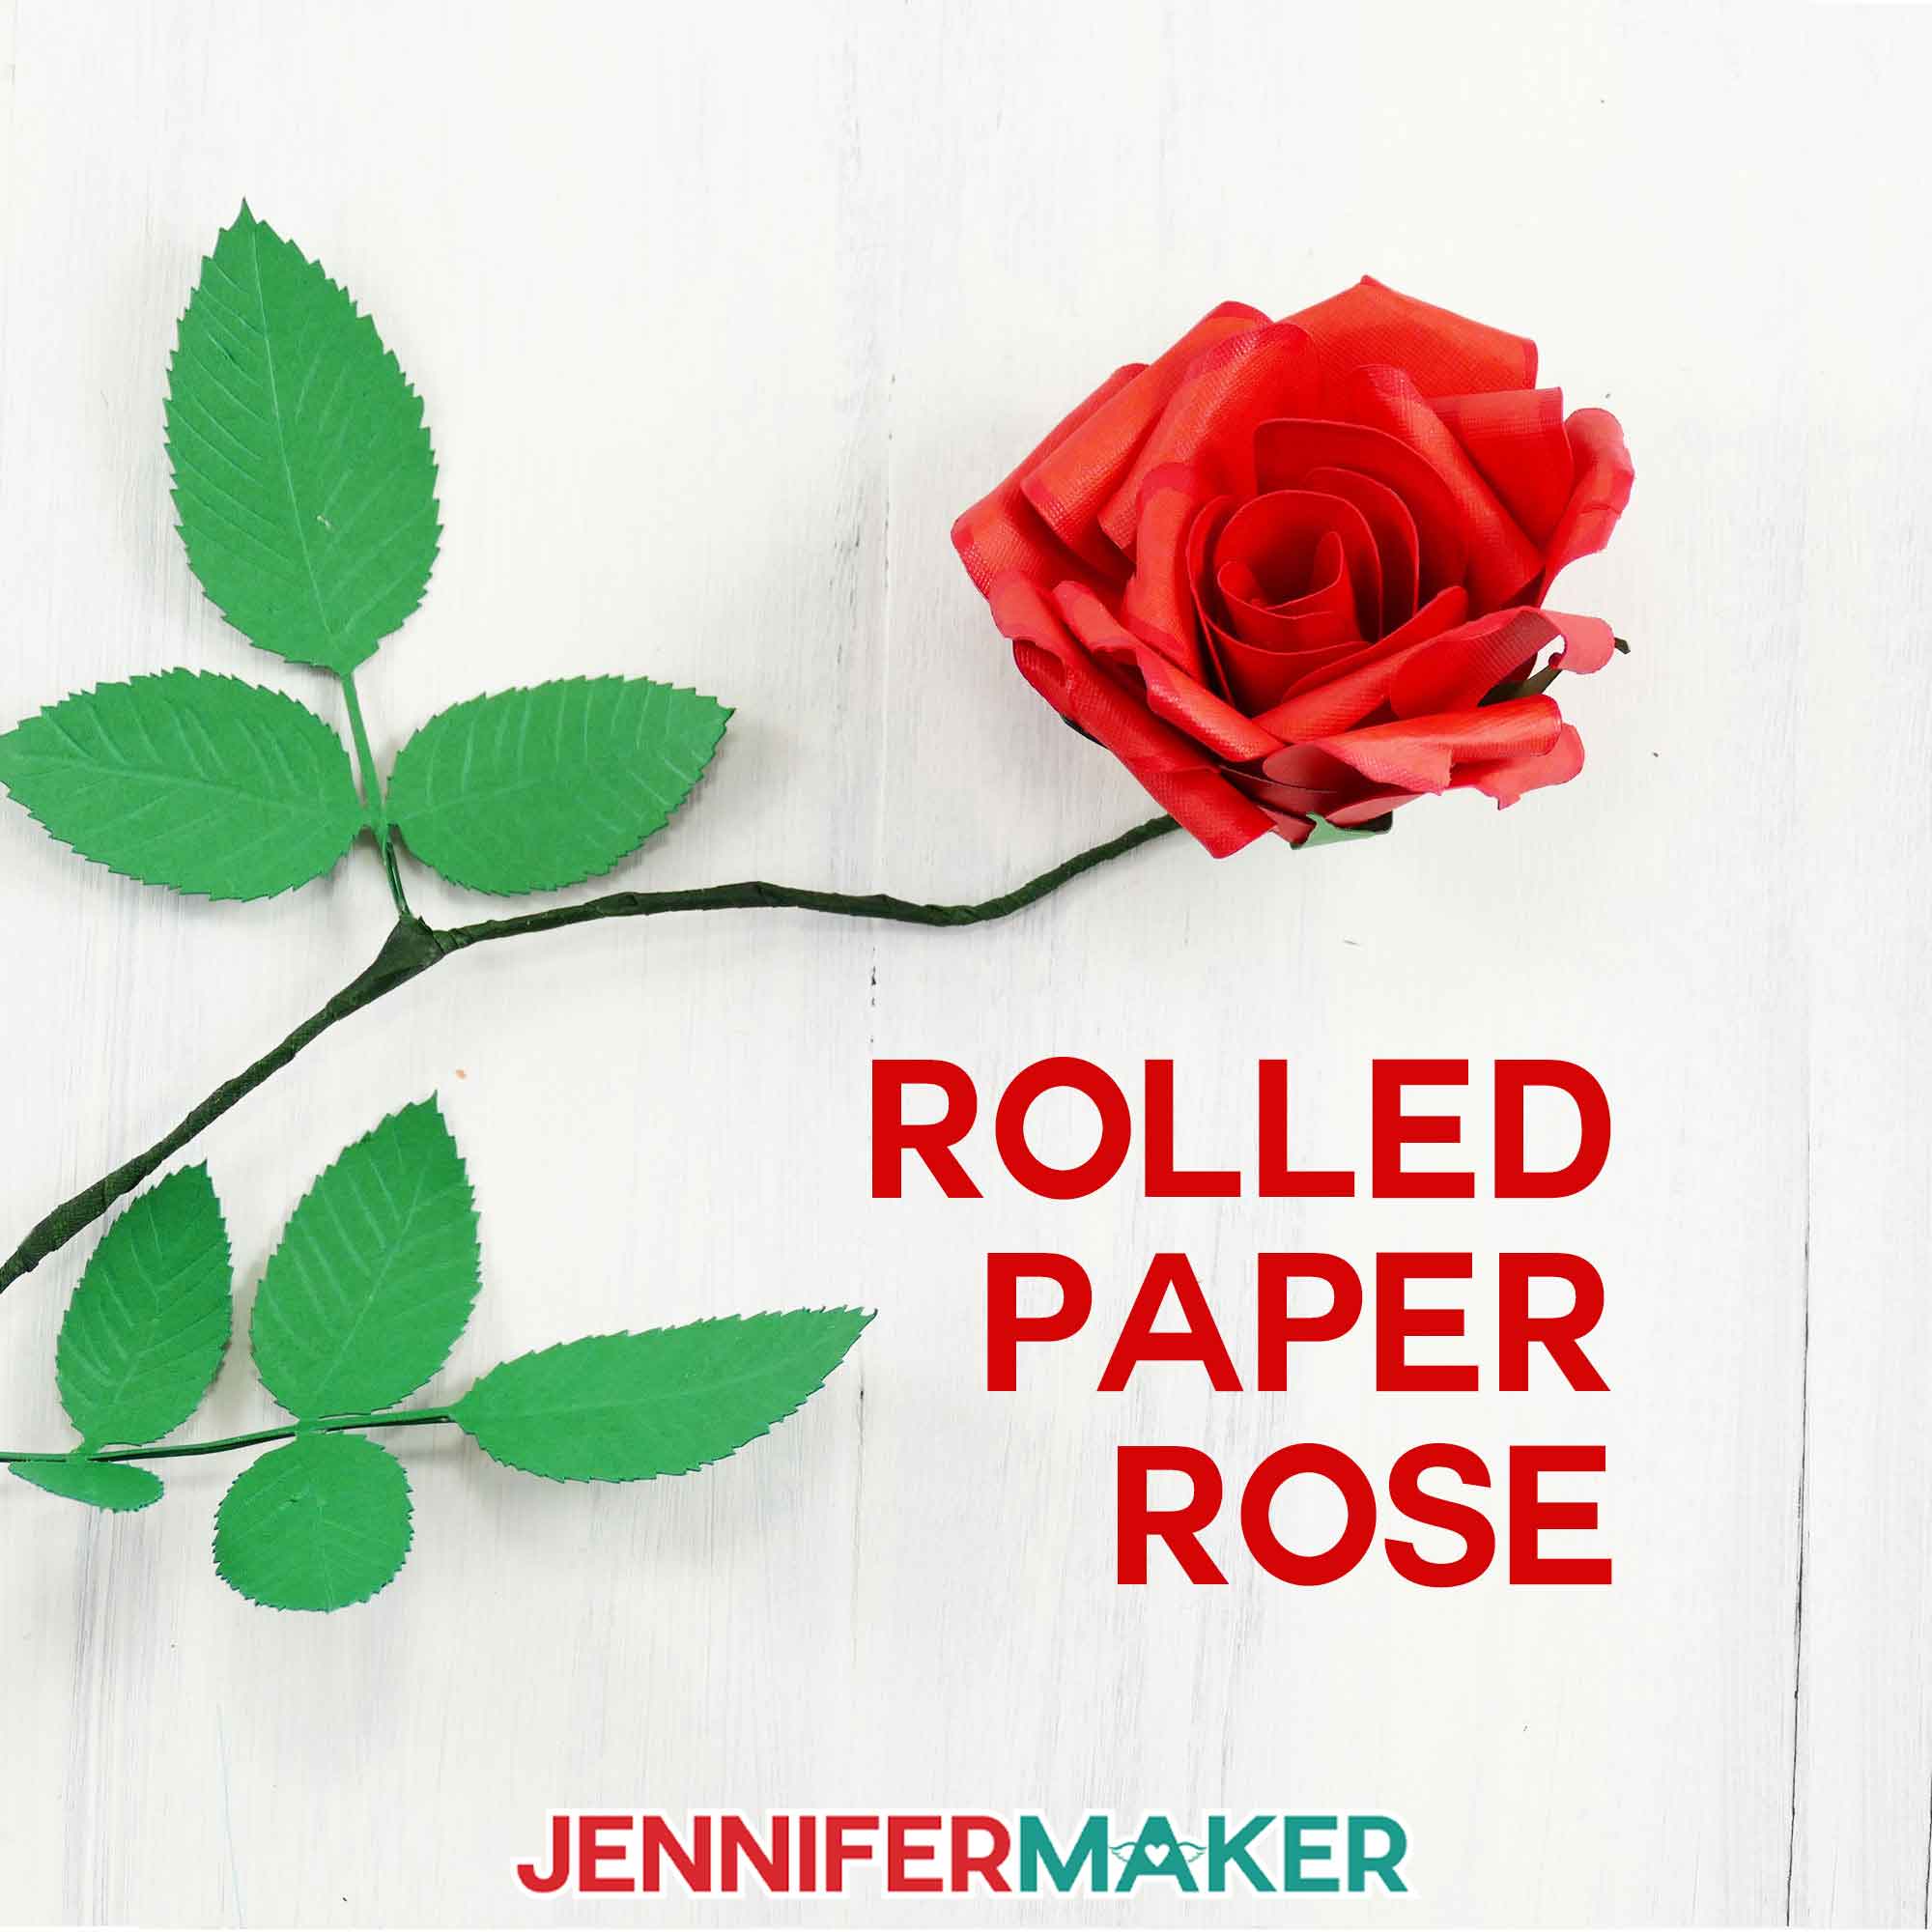
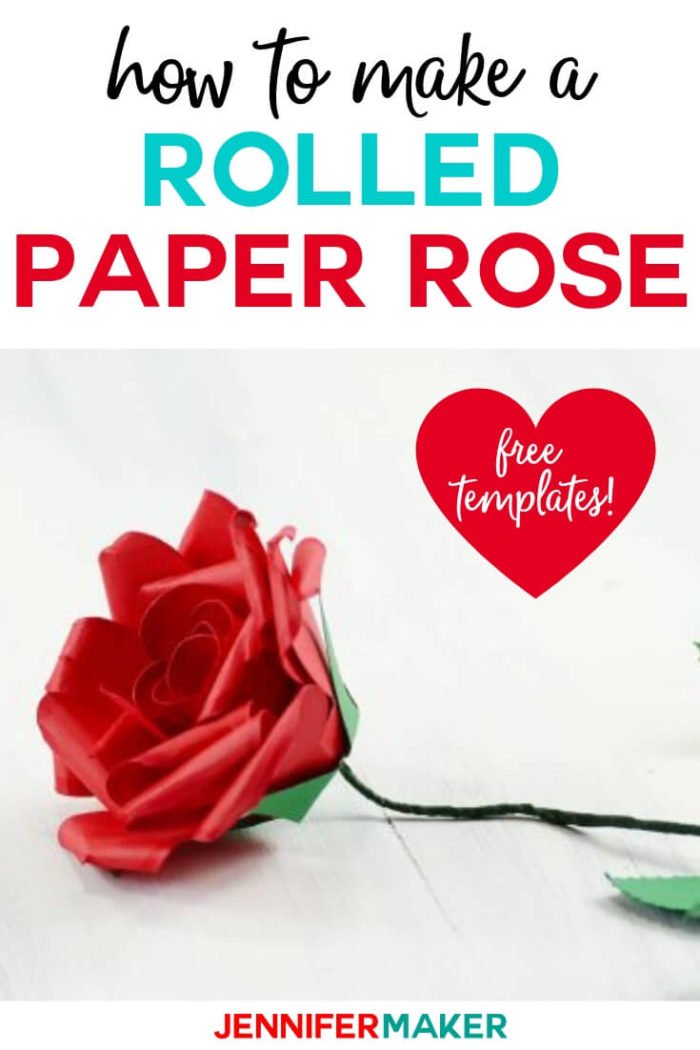
The sun is shining, birds are chirping, and I am in a full-blown flower-making mood! This past weekend I made paper peonies, but the last two days I’ve been making paper roses. It’s such as easy thing to do just sitting here at my desk, twirling paper in between my work tasks. And I just love how pretty they look! I like these paper roses much better than silk roses. I experimented with markers and texturizing to create an even more realistic rose. So I am super excited to share my rolled paper rose tutorial with you today!
To create the rose pattern, I researched the shape of the rose petals. While roses have stamen, they tend to be hidden in the unfurling bud, so I didn’t include them. But I did make the bud’s petals a little different than the outer petals, to emphasis the rolled center while still allowing the outer petals to appear more separate from one another. I think it turned out great!
Update: In August 2017, I reworked my rose pattern so that each of the larger, outer petals was UNIQUE and traced from real rose petals. I think this makes for an even more realistic looking rose. I used the same petal shape that I used for my Giant Spellbound Rose.
And while I was researching shapes, I traced photos of actual sepal (the star-like leaves at the very base of the rose) and the leaves on the rose stem. The combination of the rose with the sepal and leaves is very convincing!
Quick Links to Information in this Post
Some of the links below are Amazon affiliate links for your convenience. Read my full disclosure policy.
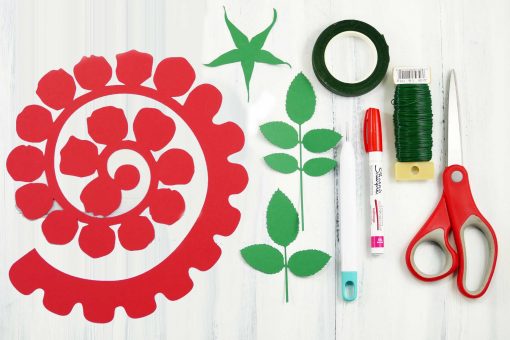
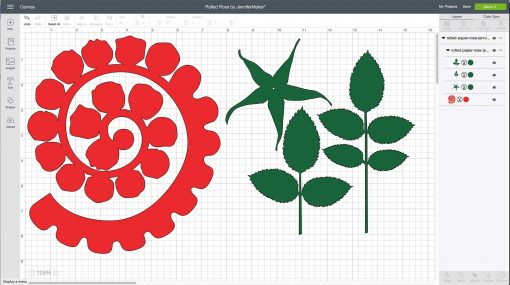
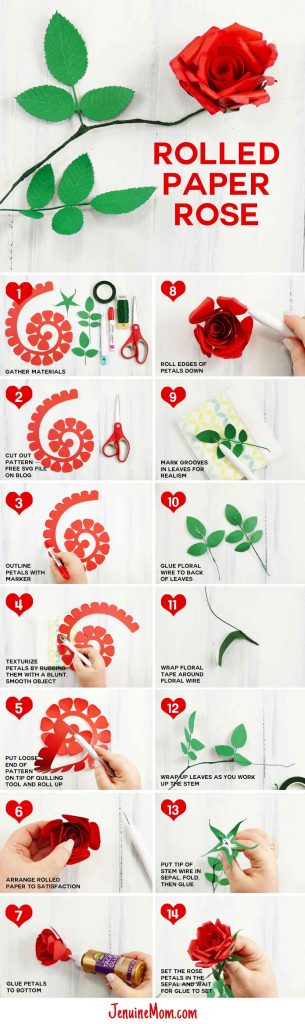
Step 1: Cut out the rose petal pattern, sepal, and leaves (Design #18). You can do it by hand with a pair or scissors or X-acto knife, or use a cutting machine such as a Cricut or Silhouette. I have the PDF cutting patterns and SVG/DXF cut files for either method available freely in my Resource Library (get the password to the Library by subscribing to my crafty little newsletter for free at the bottom of this post).

In Cricut Design Space, I cut the rose petal pattern out at 8″ wide and the leaves at 7.5″ wide. They should upload to Design Space at the correct size. Just click “Make It,” load your mats, and cut!
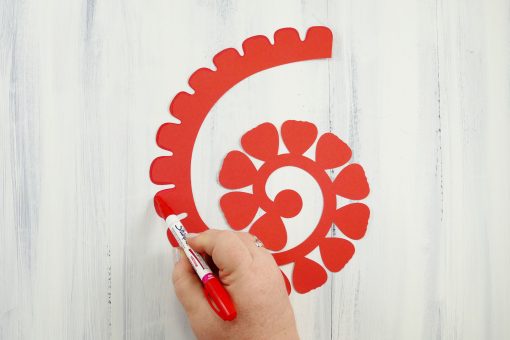
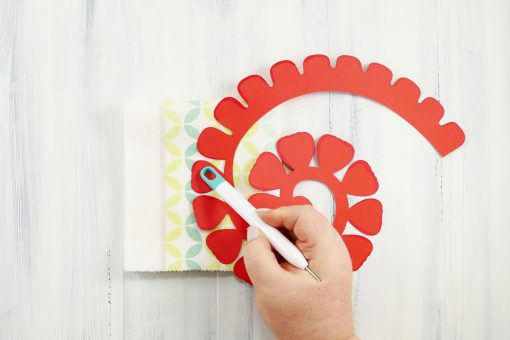
Step 2 (Optional) Trace around the petals with a marker in an appropriate color. In the photo below, I’m tracing with a red marker that shows up just slightly darker than the red paper. This gives your roses a more natural look.
Step 3: Soften and texturize the petals by going over them with a blunt, rounded object, such as the bottom of your quilling tool. I find it works best if I rest the petals on a paper towel that has been folded several times — this makes the paper more pliable.
Step 4: Put the loose end of your flower pattern in the slot in the tip of your quilling tool and being rolling toward you. If you do not have a quilling tool, you can use long-nose pliers, tweezers, or a toothpick with a slot cut into it with an X-acto. Continue rolling your paper, keeping the bottom edges aligned with one another as best you can.
Here is a quick video that shows you how to roll flowers, including the rose:
Step 5: Once you’ve wound the paper onto your quilling tool, fold up the bottom circle and remove the tool. The flower will unfurl in your hands. If it doesn’t seem to unfurl as you would expect, it may be that one of the separate petals is caught on another petal — gently separate it. You may also want to unwind the center to open the flower up more.
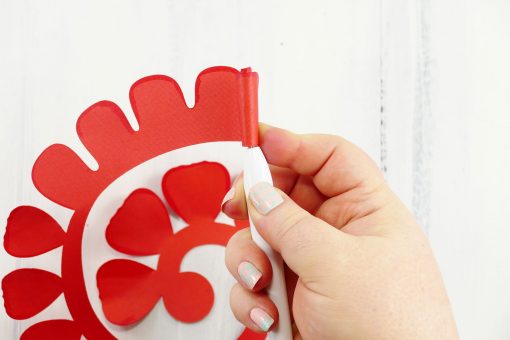
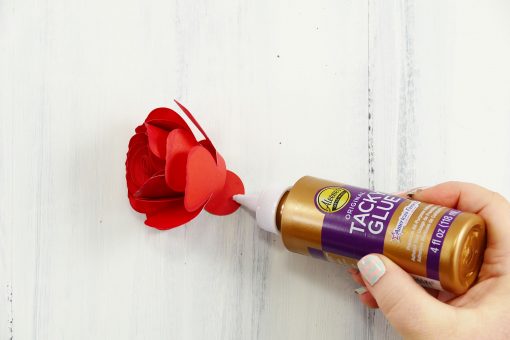
Step 6: Once your rose looks the way you want it to, put glue on the bottom circle and press it against the bottom edges of the flower petals to set it.
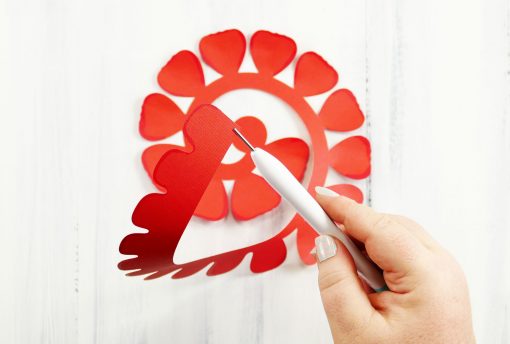
Step 7: Use your quilling tool or the edge of something long and cylindrical to roll the edges of your petals. This makes the rose look much more realistic, and also fills it out.

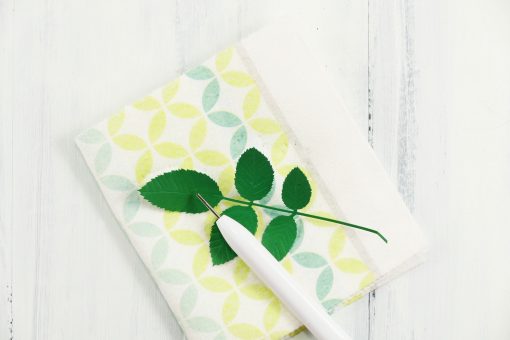
Step 8: If you want to add a stem with leaves, place the leaves on your paper towel and use your quilling tool to score leaflike lines in them. I like to put one long line in from top to bottom of each leaf. Then I add radiating lines outward and upward from the line to the edge.
Note: If you don’t want a stem, just skip to step 13.
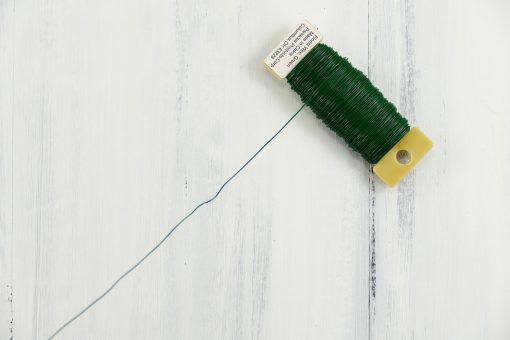
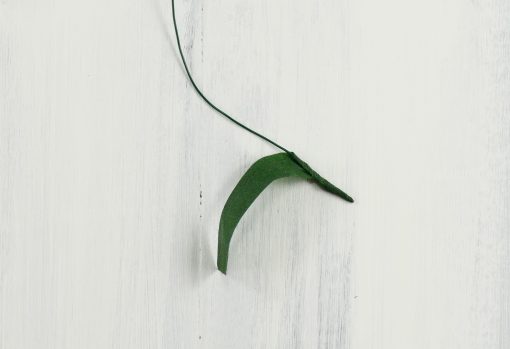
Step 9: (Optional) Trim off a 4-5″ piece of floral wire and glue it to the back of each sprig of leaves. Allow it to dry before moving on to step 10. The wire keeps the leaves from flopping over and allows you to position them where you want them later. It’s not absolutely necessary — I just like it.

Step 10: Cut a 12″ piece of floral wire. Then cut a 3-4″ piece of floral tape and begin wrapping it around one end. Pull gently on the tape as you wrap — this encourages it to stick to itself. Wrap several inches at the bottom.
Step 11: Add the larger sprig of leaves to your stem and continue wrapping up and over it. Once you’re about 2/3 of the way up the stem, add the smaller sprig of leaves and finish wrapping all but the last 1/2″.

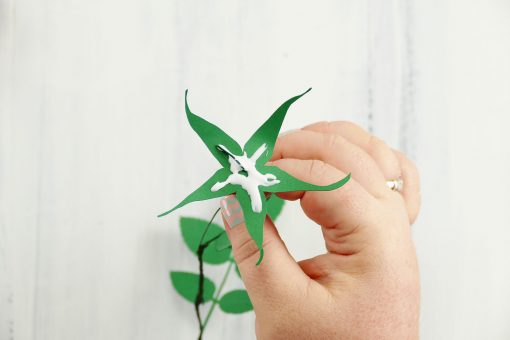
Step 12: Poke the unwrapped end of your stem wire into the bottom center of your sepal and fold over 1/2″ into a 90° angle.
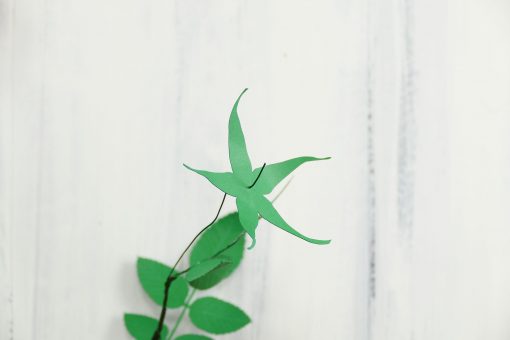
Step 13: Put glue on the sepal and attach it to the bottom of your rose. Fold the petals on the sepal up onto the sides of the rose. Allow glue to dry.

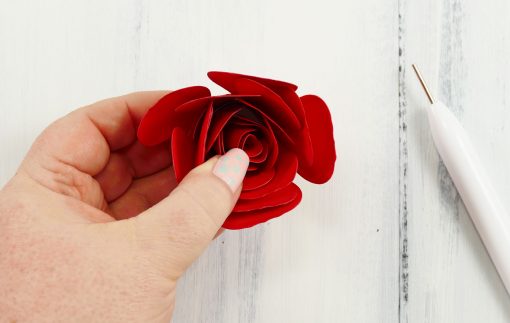
Isn’t it pretty? Here’s the rose, all finished!


I am so pleased with this rose! I found it to be a bit more challenging to both design and make than my peony, mostly because of the way the petals like to separate and overlap. I had to fuss with it more after I’d rolled it, but it wasn’t anything crazy either.
I think this would look lovely with different types of paper, too. One with a sheen would really show off the petal contours, I think. And, of course, you can make these roses from unique sorts of paper, such as pages from your favorite book or even a printed photo.
I made this rose for an Enchanted Rose from Beauty & the Beast for my friend Sara. (If you know Disney, you probably know about this famous red rose!) So definitely check out that tutorial, too!
Get the password for the library with the free paper rose pattern PDF and SVG/DXF files here by filling out this form.

Subscribe (free!) to my newsletter with updates and tips PLUS get instant access to my resource library with this file and all of my other free files, printables, and patterns! Once subscribed, I will send you a newsletter with details about my new free files each week.
Success! Now check your email to confirm your subscription. The password to the library is craftthelove -- copy and paste the password in at https://jennifermaker.com/resource-library to get access to my resource library right now!
Free Resource Library
Enter my free resource library for my latest files, printables, and patterns! Password is 'craft' -- please copy and paste that in at the link above. Thanks for being a subscriber!!
If you make this rose, I’d love to hear about your experience! I’d also love to see your rose. 🙂

Shop for supplies:


Jennifer Marx is a designer, an enthusiastic crafter, a lifelong teacher, and a proud overcomer of a variety of life's challenges. In her spare time she loves to play D&D and video games, garden, sew costumes, and go to Disney. She lives a full, happy life in beautiful Ann Arbor, Michigan with her partner Greg, her daughter Alexa, their two dogs, Hunter and Chloe, and their sassy orange cat, Butterscotch.